PDXpert PLM Software
Application Note
Exporting a bill of materials from PDXpert to Visio
Last update 2017-12-20
This procedure requires a recent PDXpert release.
If you have PDXpert release 9.2 or earlier, you can manually create a Visio import file using some basic formulas and a few minutes of find/replace. See Creating a graphical bill of materials in Visio (older releases)
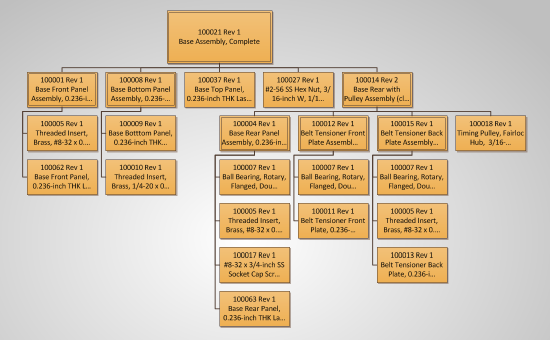
With PDXpert PLM software, you can create parts in multi-level structures. While most PLM software users will be quite comfortable navigating the multi-level structure within PDXpert, you may occasionally require a graphical means for showing the product. A picture may be useful during a major design review, or as a navigation reference for manufacturing, product service or customer support staff.
In a just few minutes, you can have a graphical view of your bill of material in Microsoft® Visio®. Although this app note uses Microsoft Visio 2010, the technique should also be applicable to later releases.
Set up the BOM export format in PDXpert PLM software
We'll create a new member of the PDXpert Transforms collection (see the PDXpert client help guide: Contents > How to use the Collection Explorer > Adding a new collection member).
We'll only need to do this once, and then we can use our Transforms collection member any time we want to create the export file.
Download this file, which contains the transform that you'll need.
In the Collection Explorer:
On the Transforms collection node, right-click to .
-
Set the Name to Export Visio BOM.
-
Open the Export-Visio-BOM.txt file in Windows Notepad (not in a word processing application). Copy the entire contents (Ctrl+A, Ctrl+C), and paste it (Ctrl+V) into the new member's XML textbox.
Close or lock the window to save your changes.
After we have created the new Transforms collection member, we're ready to export the multi-level bill of materials.
Export a PDXpert PLM software bill of materials file
To export the Visio BOM file from PDXpert:
Open the Report/Export Wizard ().
- Select the Export Visio BOM dataset, and click the button.
- Drag a multi-level assembly from the Item Explorer onto the Report/Export Wizard, and click the button.
- In the Save As file dialog, enter a file name. On the Save as type: dropdown, select Text (tab delimited) (*.txt). Click the button.
Import the bill of materials file into Visio
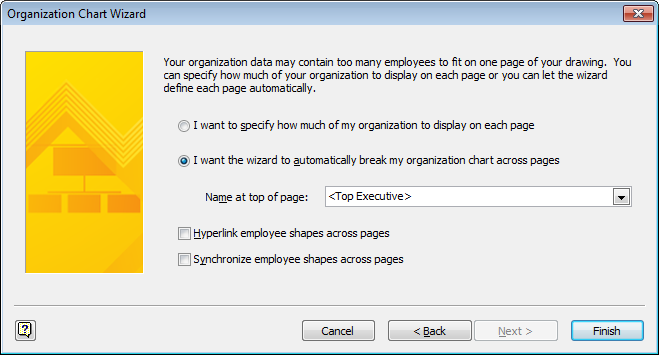
Visio 2016 has a useful utility called the Organization Chart Wizard. It will import a list of relationships and automatically create a hierarchical organization tree, which looks pretty similar to what we'd want for our product tree.
The Organization Chart Wizard assumes that an employee can have only one manager, and automatically filters duplicate employee records. However, our product structure may contain a component that appears on multiple assemblies. So, the transform tricks the Organization Chart Wizard by assigning different "employee IDs" to the same part1 based on where it's used in the BOM.
In Microsoft Visio:
-
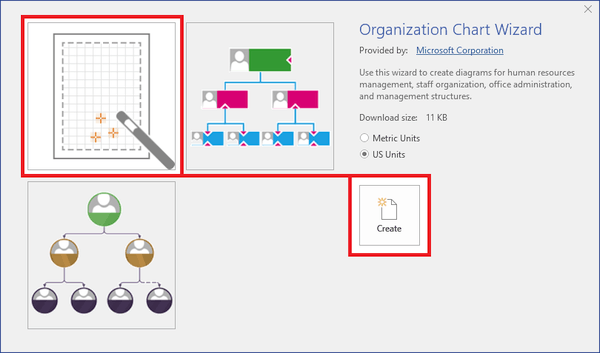
Create a new Visio file using the Organization Chart template. Select the Organization Chart Wizard, which is easier to format than the other options.
-
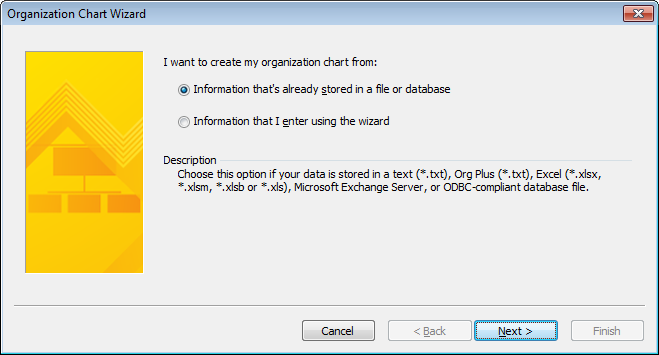
On the Wizard, select Information that's already stored in a file or database, and click the button.
-
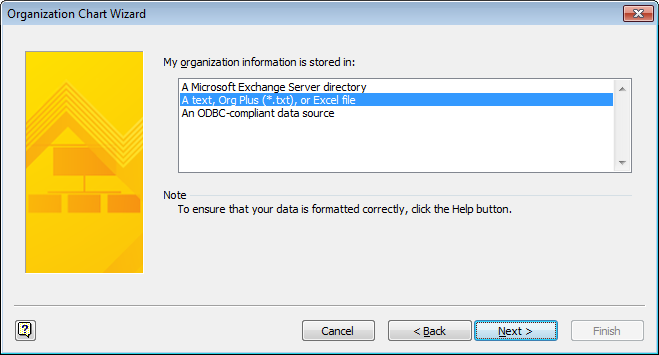
Select the import format as a text file.
-
Browse to find the bill of materials import (.txt) file.
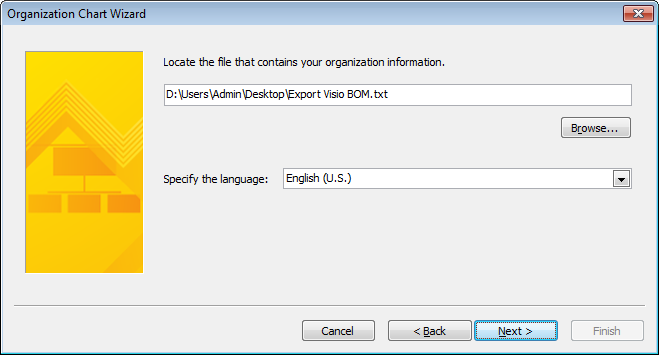
-
Specify the file data that uniquely identifies your items within the product tree:
- The Name: value as Id column.
- The Reports to: value as Reports To column.
- There's no First name: value.
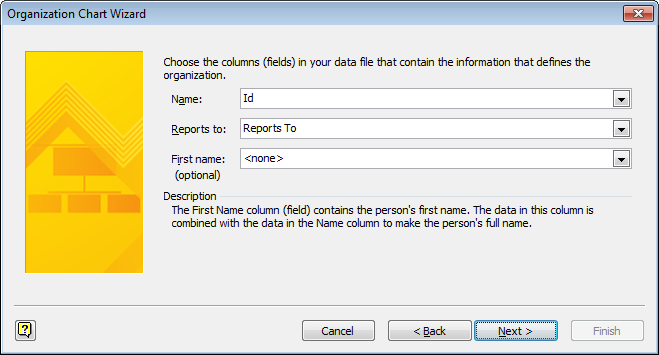
-
Specify the displayed fields as the Item (part number) column and Name (part description) column.
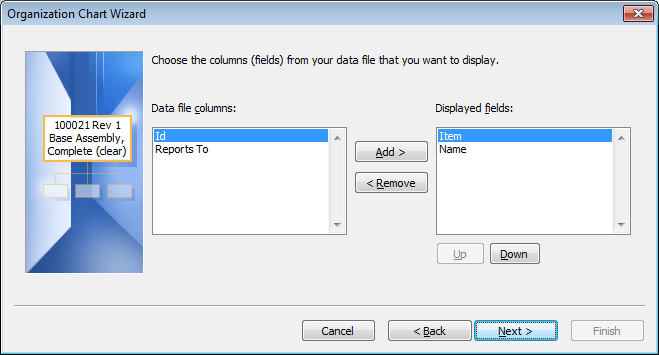
-
There are no shape data fields in the default transform, so click the button.
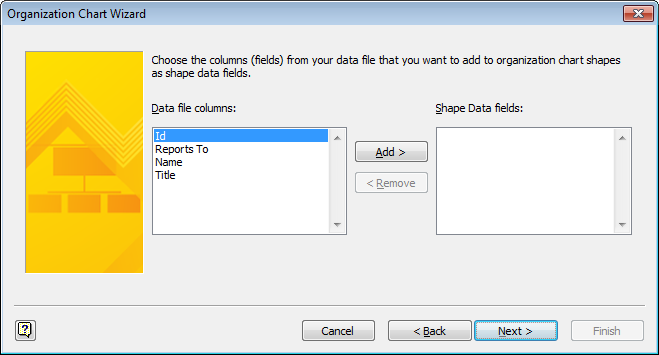
-
Specify the layout options that you want Visio to apply. Click the button.
Final notes
You can use Visio's tools to arrange the objects, and to apply themes and other formatting as desired.
The transforma can be modified to suit your needs.
DECLARE @MaxLvl int = 4; -- maximum number of levels displayed
DECLARE @NameLimit int = 35; -- max length of part name to fit Visio box
If you have more than a few levels in your bill of materials, use the @MaxLevel value to set how "deep" you want to expand your product structure. To ensure that the item descriptions fit within the Visio boxes, the transform provides a @NameLimit value. Change the value to adjust the description maximum length.
Given display & printing size constraints, you may wish to omit some items. This can be done by editing the BOM export file in Windows Notepad or Notepad++2 before importing into Visio, or simply deleting objects after the import is finished. To apply a consistent filter, add a WHERE clause in the transform:
...
) MLBOM
WHERE Type = 'Assembly'
ORDER BY TreeId
PDXpert's transforms are extremely flexible. Other useful data can be exported from PDXpert, and imported into the Visio diagram.
Notes
- The Id and Reports To identify node positions (indent level + find) within the BOM graph. The values are arbitrary, and have no meaning outside of the current file.
- Excel is not a good editor for delimited text because it can misinterpret Unicode and extended ANSI characters, and convert text with leading zeroes into numeric values or dates.
This application note was relevant to the PDXpert software release that was current at time of publication. Product changes since that time may affect its utility. We'd be happy to assist you in assessing the applicability of this note to your situation.
Working within PDXpert
- Designing an engineering change process and workflow
- Server: Fast file content searches using IFilters
- Server: Scheduled backup for the database and library
- Server: Running several PDXpert Application Servers on the same network
- Batch Import: Preparing file attachments for import
- Batch Import: Converting a PDX package for PDXpert
- Batch Import: Keep settings, remove test item records
- Batch Import: Creating release sets for imported data
- Batch Import: Bulk replacing item attributes
- PDX package: Compare all product data, not just the BOM
- PDX package: IPC-2570 package implementation
- PDX package: IPC-2570 security signing and password extensions
- Adding a custom SQL Server report to PDXpert
- Adding a custom SQL Server report to PDXpert 8.0 to 11.2
- Designing email notice templates
- Including labor time and cost in assemblies
- Materials management for regulatory compliance
- Switching an existing item to a different type
- What's the difference between Item Revision State and Item Lifecycle Phase?
- Copying an assembly BOM to another assembly
- PDXpert permissions: User access design
Working with other software applications
- Using Altium Designer EDA software with the PDXpert client
- Using Altium Designer EDA software with the PDXpert server
- Using Cadence OrCAD Capture CIS with the PDXpert client
- Using Cadence OrCAD Capture CIS with the PDXpert server
- Using Pulsonix EDA software with the PDXpert server
- Importing a CAD bill of materials into PDXpert PLM software
- MRP/ERP data transfer options with PDXpert PLM software
- Exporting PDXpert PLM parts, BOM & sources to MRP/ERP
- Importing Trilogy Design Parts&Vendors data into PDXpert
- Exporting a bill of materials from PDXpert to Visio
