PDXpert PLM Software
Install Guide
PDXpert client installation options
Instructions for system administrators who need to create a Windows Group Policy deployment package to automatically distribute PDXpert client software to client workstations. See, for example, thisMicrosoft knowledge base article.
The PDXpert.exe client is a start-up tool that authenticates the user and confirms the server's release. The tool then starts a separate PDXpert.UI.exe that contains the PDXpert user interface. The PDXpert.exe tool can talk with any PDXpert server, while the PDXpert.UI.exe must match the server release.
If the current PDXpert.UI.exe doesn't match the server's release, the start-up tool downloads the matching release via http: on TCP port 48084. The new UI client is saved in the user's %LocalAppData%/PDXpert/Assemblies folder. All downloaded clients are kept to allow switching between servers with different releases.
Client-server communications use TCP port 48085 (unencrypted) or port 48086 (encrypted), depending on the client log-in options.
The user profile must have Windows permission to download, save and run the client UI code in the folder.
The client's antivirus service must allow full access to the %LocalAppData%/PDXpertfolder.
The firewall must be open on port 48084, and one or both ports 48085, 48086.
Some files are not created during installation, but are added to the folder after the client connects to the server (such as cache and log files).
The normal client setup file (PDXpertClientSetup.exe) installs thePDXpert.exe start-up tool into the user profile's %LocalAppData%/PDXpert/Application folder. The EXE is a WiX installer that can run from the command line, and offers /quiet and /passive command switches. Use the/? switch to get the brief WiX help topic; for example, if the setup file is on the Windows Desktop:
C:\Users\Admin\Desktop>PDXpertClientSetup-{release}.exe /?
The PDXpert download page has a client setup file (PDXpertClientSetupMPx64.msi) that installs into the machine profile. Use this for a PDXpert kiosk, Remote Desktop Services, CITRIX® and similar multi-profile applications.
PDXpert client releases (8.0 until 9.3) are installed into the current user's profile.
To create your GP deployment package, you can extract the necessary components from the PDXpert installer. The PDXpert client installer .EXE file contains three components:
- Separate installation profiles for 32-bit and 64-bit Windows
- pdxpert.client.setup32.msi
- pdxpert.client.setup64.msi
- A pdxpert.client.setup.cab file that contains code common to both 32-bit and 64-bit Windows.
The correct MSI file and the shared CAB file must first be transferred to a client workstation. The MSI file is then launched to begin installation.
This section describes how to extract the MSI and CAB files from the PDXpert client software installer .EXE file.
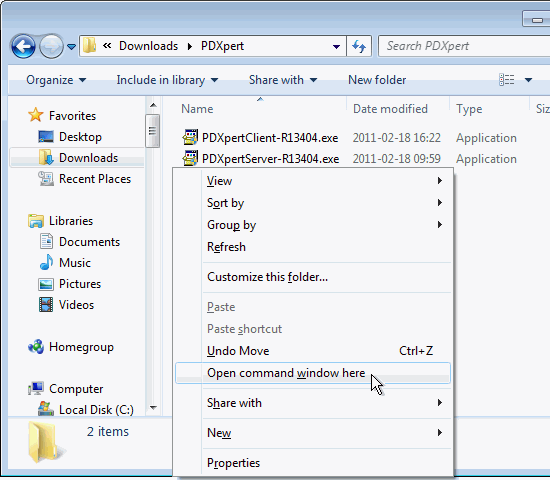
After downloading the PDXpert server and client installer files into a convenient folder, open Windows Explorer and navigate to the folder.
Holding down the keyboard Shift key, right-click within the folder to display the context menu. Select Open command window here to open a command prompt.
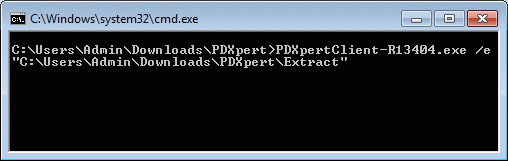
Type in the extraction command:
PDXpertClient-Rnnnnn.exe /e "C:\[yourpath]\Extract"
For example:
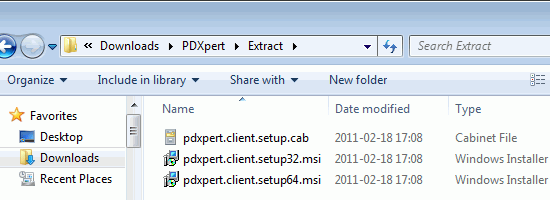
Close the command prompt window and note that the two MSI and one CAB file are now in the destination folder, as show below.
If the Program Compatibility Assistant window is displayed, you can click the Cancel button.